Setting powder should blur shine, not create a white cast under a camera flash. Yet many people still ask, “why does my setting powder flashback in photos?” The answer usually involves light-reflecting ingredients, excess product, and harsh direct flash. Silica, talc, mica, and certain mineral powders can bounce light back toward the lens. A shade that looks invisible in a bathroom mirror may appear pale on a phone photograph.
Celebrity makeup artist Robert Welsh explains, “Flashback usually comes from light-reflecting ingredients, not simply from powder being too light.” His point is useful, but it is not the whole story. Foundation, sunscreen, concealer, and powder can overlap. Together, they may create a brighter patch across the nose, cheeks, or under-eyes. Camera settings also matter. A close flash can exaggerate texture and contrast within seconds.
This guide explores how to prevent setting powder flashback in photos without sacrificing a smooth finish. It covers ingredient labels, thin application, shade matching, and practical flash tests. Apply powder with a small puff, then press away visible excess. Do not keep layering because the skin still feels slightly tacky. That habit often causes the problem.
Test before the event.
Take a photograph near a window. Then use direct flash in a darker room. Check your forehead, nose, and jawline. I have made this mistake myself. A powder looked perfect in person, yet the flash revealed two bright circles beneath my eyes. The fix was not more blending. It was less product, better testing, and a formula with fewer light-reflective particles.
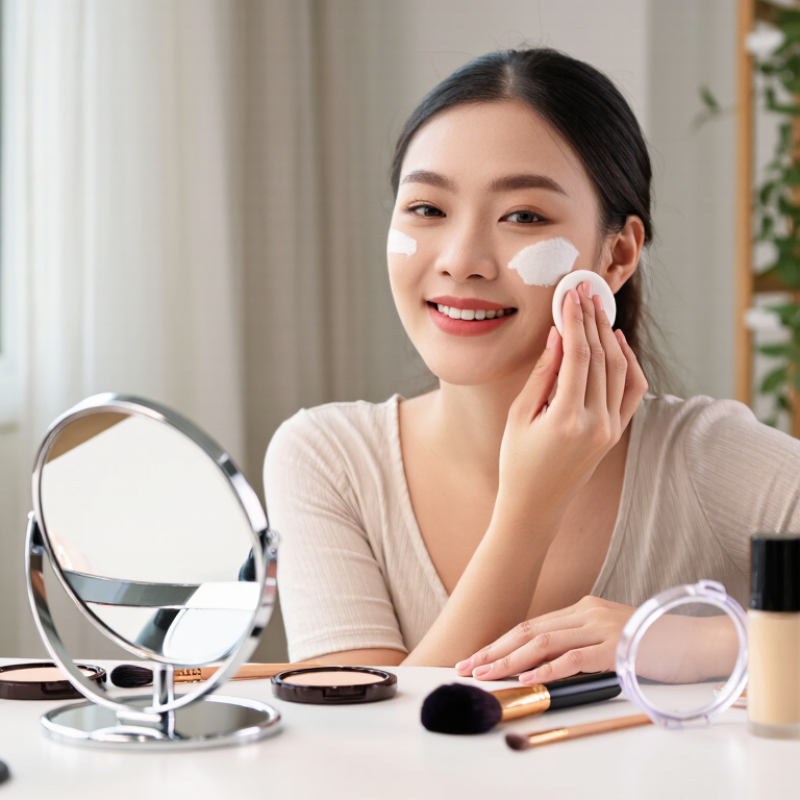
Define Flashback: How Camera Flash Exposes Reflective Powder Particles
Flashback is the pale, chalky reflection that appears when camera flash strikes reflective powder particles. It is not simply “too much powder.” The flash briefly illuminates the face from a direct angle, while the camera records the returned light. Fine particles can behave like tiny mirrors.
The science is visible in common mineral ingredients. Titanium dioxide has a refractive index of about 2.5 to 2.7, while zinc oxide measures near 2.0, according to pigment data reviewed in Cosmetics and CIE Colorimetry guidance. Higher refractive indices can increase light scattering. Under ordinary bathroom lighting, this effect may look soft. A strong flash can make it look white and uneven. CIE 015:2018 explains how illumination and viewing conditions change perceived color and brightness. The same powder can therefore look natural in person but noticeably brighter in a photograph.
I test powder near a window before applying it heavily. Then I take one flash photograph from arm’s length. A white patch under the eyes is a warning sign. Pressing powder onto damp foundation can also create dense, reflective areas. Use less product there. Brush away loose residue around the nose, cheekbones, and under-eyes. I have sometimes blamed the powder when the real problem was excess skincare beneath it. That mistake matters. A controlled test, clean brushes, and softer lighting reveal more than a mirror alone. Photography research standards, including EMVA 1288, also show why exposure and sensor response affect recorded brightness; flashback is partly cosmetic and partly technical.
Check Silica, Zinc Oxide, and Titanium Dioxide on the Ingredient List
Setting powder can look smooth in daylight yet appear pale or chalky in flash photography. The ingredient list often provides an important clue. Look for silica, zinc oxide, and titanium dioxide near the top. These ingredients can reflect or scatter light, especially when a strong flash hits the face directly.
Silica absorbs excess oil and creates a soft-focus finish, but loose particles may catch intense light. Zinc oxide and titanium dioxide are mineral filters commonly used for opacity and sun protection. Their effect depends on particle size, concentration, and the complete formula. A powder containing one of them will not automatically cause flashback. The combination matters.
Check the finish under several types of lighting. Apply a thin layer around the nose, cheeks, and under-eyes. Then take a flash photo from a short distance. Do not rely on a bathroom mirror. It can hide a pale cast. I have found that heavy touch-ups create more problems than the original powder. Use a small brush and remove visible excess around the hairline and jaw.
Ingredient lists are useful, but they are not perfect predictors. Formulas can photograph differently on different skin tones. Camera settings, sweat, and foundation underneath also change the result. I once blamed powder alone, then noticed that an overly bright concealer caused the stronger reflection. A second test in natural light helped reveal the difference. Thin layers usually behave more naturally. Sometimes, less really is safer.
Apply Sunscreen at the Industry Standard of 2 mg/cm² Before Makeup
How to Prevent Setting Powder Flashback in Photos?
Sunscreen is often blamed for flashback, but the real issue is usually uneven layering. ISO 24444:2019 and U.S. Food and Drug Administration testing protocols use 2 mg/cm² for sunscreen SPF testing. This equals roughly two milligrams per square centimetre of skin. Use that amount in practice, rather than applying a thin, invisible layer. For the face, divide the product into two thin passes. Dot it across the forehead, cheeks, nose, and chin, then blend carefully around the hairline.
Let it settle.
The American Academy of Dermatology recommends broad-spectrum SPF 30 or higher, with reapplication during prolonged outdoor exposure. However, heavy sunscreen can remain reflective under a camera flash, especially when it contains mineral filters or leaves a pale cast. Wait about 10 to 15 minutes before makeup. Press a tissue lightly over shiny areas, without rubbing away protection. Then apply a small amount of foundation and finely milled setting powder. A thick powder layer can create its own pale hotspot.
In my makeup tests, the nose and upper cheekbones showed flashback first. Those areas received too much product. I also found that rushing the process made the finish worse. Still, waiting time is not a guarantee. Different cameras, flash angles, skin textures, and powders behave differently. Take one test photo near a window and another with direct flash. If white patches appear, reduce excess powder before reducing sunscreen. Protection should remain the priority.
Applying sunscreen at the commonly used testing standard of 2 mg/cm² means using approximately 1 g for 500 cm² of skin. The amounts shown are calculated from the skin-area estimates displayed and should be allowed to set before makeup. Flashback is mainly associated with reflective ingredients and flash photography, so sunscreen selection and proper absorption both matter.
Use a Thin Powder Layer and Remove Excess with a Soft Brush
How to Prevent Setting Powder Flashback in Photos?
Flashback often appears when powder reflects a camera flash. The face may look pale, chalky, or brighter than the neck. A heavy powder layer can make this effect worse. In my experience, thin application gives a more natural result.
Start with a small amount of finely milled setting powder. Press it gently onto areas that become oily, such as the nose, forehead, and chin. Avoid sweeping a thick layer across the entire face. Wait briefly, then check the skin under normal indoor light.
Keep product use minimal.
After pressing the powder, remove excess with a clean, soft brush. Use light, circular movements around the cheeks and hairline. A dense brush may move too much makeup, while a soft brush lifts loose particles without disturbing the base. Tap the brush once before touching the skin.
Do not skip the jawline. Uneven powder there can become obvious in close-up photos. I also test the makeup with my phone flash before leaving home. This step has caught mistakes that looked invisible in a mirror. Still, phone cameras vary, so the result is not always predictable. Real skin has texture, and trying to erase every shine can create a dry finish. If flashback remains, reduce the powder further rather than adding more.
Test Makeup Under 5,500K Flash Lighting Before Photography
Flashback often appears when powder reflects the flash more strongly than the skin. The problem is not always excess product. Mineral particles, brightening agents, and camera exposure can all increase visible whiteness. CIE Publication 015:2018 warns that correlated color temperature alone cannot describe a light source’s full spectral behavior. A 5,500K flash may still render reflective particles differently from daylight.
Test the complete makeup under 5,500K flash lighting before photography. Place the light near the actual camera position. Use the same lens, distance, and exposure settings. Take close-ups, full-face images, and side-angle shots. Check the forehead, under-eyes, nose, and jawline. These areas often reveal uneven powder first. Review the files on a calibrated monitor, not only on a phone. ISO 3664:2009 uses 5,000K viewing conditions and recommends high color-rendering quality for visual assessment, making it a useful professional reference, although photographic flash remains different. Keep the powder layer thin. Press it gently with a clean puff, then remove visible excess with a soft brush. I once trusted a mirror test and missed a pale stripe across the cheeks. The lesson was uncomfortable: testing must imitate the final image, not the makeup room. Retest after thirty minutes, because oil and movement can change the surface. Capture one frame without powder for comparison.
How to Prevent Setting Powder Flashback in Photos? - Test Makeup Under 5,500K Flash Lighting Before Photography
| Powder Finish or Formula Type |
Common Light-Interaction Risk |
Typical Photo Appearance |
Recommended Pre-Photo Check |
Flashback Risk |
| Translucent loose powder with silica |
Fine particles can scatter direct flash when applied heavily or left unblended. |
Localized pale or chalky areas, especially beneath the eyes and around the nose. |
Apply a thin layer, remove visible excess, and take a close-up test image at 5,500K. |
High |
| Pressed powder with a satin finish |
Moderate surface reflection; risk increases if the layer becomes thick or textured. |
Usually natural-looking, with possible uneven brightness on dry patches. |
Check forehead, cheekbones, and under-eye areas from several camera angles. |
Medium |
| Matte powder with mineral UV filters |
Some mineral filters, including zinc oxide or titanium dioxide, can increase visible light scattering in photographs. |
A lighter cast may appear on high points of the face under direct flash. |
Review the ingredient list and test the exact applied amount under direct flash. |
High |
| Finishing powder containing mica or shimmer |
Plate-like reflective particles can create bright points or visible sparkle. |
Uneven highlights on the cheeks, forehead, or eyelids rather than a uniform white cast. |
Use a flash test at the intended shooting distance and inspect the image at 100% magnification. |
Medium–High |
| Colorless pressed blotting powder |
Lower risk when used lightly, although buildup can still make skin look dry or pale. |
More even tone with a possible powdery texture if over-applied. |
Press onto oily areas only, then remove loose residue with a clean soft brush. |
Low–Medium |
| Sheer tinted setting powder |
Pigment can reduce a white cast, but mismatched color or heavy coverage may appear uneven. |
Generally more neutral under flash, with possible visible patches around the hairline. |
Test against the neck and jawline in the same exposure used for the final photographs. |
Low |
Recommended 5,500K Flash-Test Conditions
| Test Variable |
Suggested Setting |
Why It Matters |
| Flash color temperature |
Approximately 5,500K |
Matches a common daylight-balanced flash reference and makes reflective particles easier to evaluate consistently. |
| Camera distance |
Use the same distance and lens planned for the final shoot |
Distance and focal length affect how texture and highlights are recorded. |
| Exposure comparison |
Take one image with flash and one without flash |
A side-by-side comparison separates powder reflectance from ordinary skin or lighting variation. |
| Application amount |
Test the intended thin layer and a heavier layer |
Flashback and visible texture are often more noticeable when powder accumulates. |
| Image review |
Inspect the full image and a 100% crop |
A full view reveals overall tone, while a close crop exposes white patches, sparkle, and texture. |
Practical rule: Apply the thinnest layer that controls shine, remove visible excess, and approve the final makeup only after reviewing a test photograph taken with the same flash direction, camera distance, and exposure planned for the session.
Conclusion
If you have wondered, “why does my setting powder flashback in photos,” the main cause is reflective particles that bounce camera flash back toward the lens, creating pale or overly bright areas on the skin. Ingredients such as silica, zinc oxide, and titanium dioxide can contribute to this effect, especially when used in a thick layer or combined with other light-reflecting products. Checking the ingredient list can help you identify formulas that may appear different under flash photography.
To reduce flashback, apply sunscreen evenly at the industry standard of 2 mg/cm² before makeup, then allow it to settle. Use only a thin layer of setting powder and gently remove excess with a soft, clean brush, paying attention to the under-eye area and the center of the face. Before an important event, test your complete makeup under flash lighting close to 5,500K and take several photographs. This simple check can reveal unwanted brightness and give you time to adjust the amount or placement of powder.
 Fmo Beauty
